1
/
of
2
Tbox
TBOX Timer 6 - 6 x 600-630 w
TBOX Timer 6 - 6 x 600-630 w
Regular price
€108,72
Regular price
Sale price
€108,72
Taxes included.
Shipping calculated at checkout.
Quantity
Couldn't load pickup availability
- 📦 Envío discreto y con seguimiento
- 🔒 Pago 100% seguro
- ↩️ Devoluciones en 14 días
- 💬 Atención personalizada
- ✅ Productos 100% originales
Envíos desde España · Seguimiento incluido.
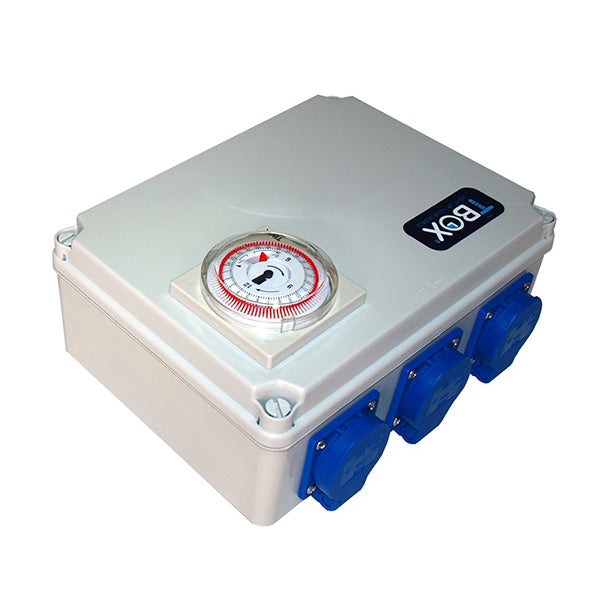
TBOX INSTRUCTION MANUAL
The TBOX® is a multi-socket timer box that controls a maximum of 4 x 600W or 6 x 400W accessories. It includes an auxiliary heating socket located at the top, which activates when the other sockets are off, allowing us to maintain the ideal room temperature using a heater.
1.1 TECHNICAL SPECIFICATIONS
Dimensions: 241 x 180 x 95 mm.
Required current: 230 Vac / 50 Hz.
Maximum power: 2,400 W.
Maximum auxiliary socket power: 2,400 W.
Analog timer
1.2 REQUIRED CURRENT
To connect the TBOX®, you will need two independent power lines, at least 15 amps each. Independent power lines are considered to be those that can be used exclusively for the TBOX®.
1.3 INSTALLATION
Remove the front panel of the TBOX® by unscrewing the 4 plastic screws in the corners of the front. In each corner of the inside of the box, you will find indentations to facilitate mounting; install it on a smooth surface using 4 screws.
Mount the TBOX® near your independent power lines. At the bottom of the TBOX®, you will find two power cables (230V) with ground.
If necessary, connect a ground wire to the power line.
Now connect the plug of each of the two power cables to the outlet of its independent power line.
The two connection cables are distributed across two independent power lines.
Your TBOX® is connected to the mains.
1.4 CONNECTION TIPS
Once you have followed steps 1.2 and 1.3, you can connect the accessories to the TBOX®. Carefully read the instructions for the accessories you wish to connect to avoid any connection errors.
1.5 SETTING UP THE EQUIPMENT FOR USE
When the accessories are connected to the TBOX®, remove the plastic cover of the clock. On it, you will find a switch with three positions:
Continuous on.
On for selected hours.
Off.
Set the switch to the "on for selected hours" position.
Set the time you want the equipment to turn on by pulling the pins when the equipment is off. Pins out means equipment on.
The minimum change time (off/on) is 15 minutes, equivalent to one pin.
1.6 SAFETY
The operation of the TBOX® is only guaranteed if the instructions in this manual are followed.
We recommend that an authorized installer install the TBOX®.
Before installation, disconnect it from the 230V power outlet.
TBOX® products have a one-year warranty.
To use this warranty, you must return the equipment to the point of sale where you purchased it.
Any alteration to the TBOX® without prior consent from the manufacturer voids the warranty. Incorrect installation voids the warranty. The manufacturer, importer, and point of sale of the equipment are not responsible for any damage resulting from the use of the TBOX®.
Compartir